WordPress offers powerful flexibility when it comes to creating engaging and structured content. As a business owner, it is crucial to know how to add tabbed content in WordPress and present it in a clutter-free and responsive way to visitors.
One of the most effective ways to organize content and improve user experience is by adding tabbed content. Whenever you see a page that separates product details into different sections without leaving the page, those are tabs.
Tabs are commonly used, especially on e-commerce sites. It allows you to present any website content from posts, images, videos, or products in space-saving templates while keeping the layout compact, interactive, and easy to navigate.
In this guide, I’ll help you to learn how to add tabbed content in WordPress using Smart Tabs while highlighting its benefits, step by step.
Let’s get in!
What Are Tabs?
Tabs help save space and keep your content organized and easier to manage. They are especially useful for user instructions and similar texts. Tabs also make long content feel shorter and more reader-friendly. If you think your WordPress website could benefit from better content organization, adding tabs would definitely be the right solution.
What Is Tabbed Content?
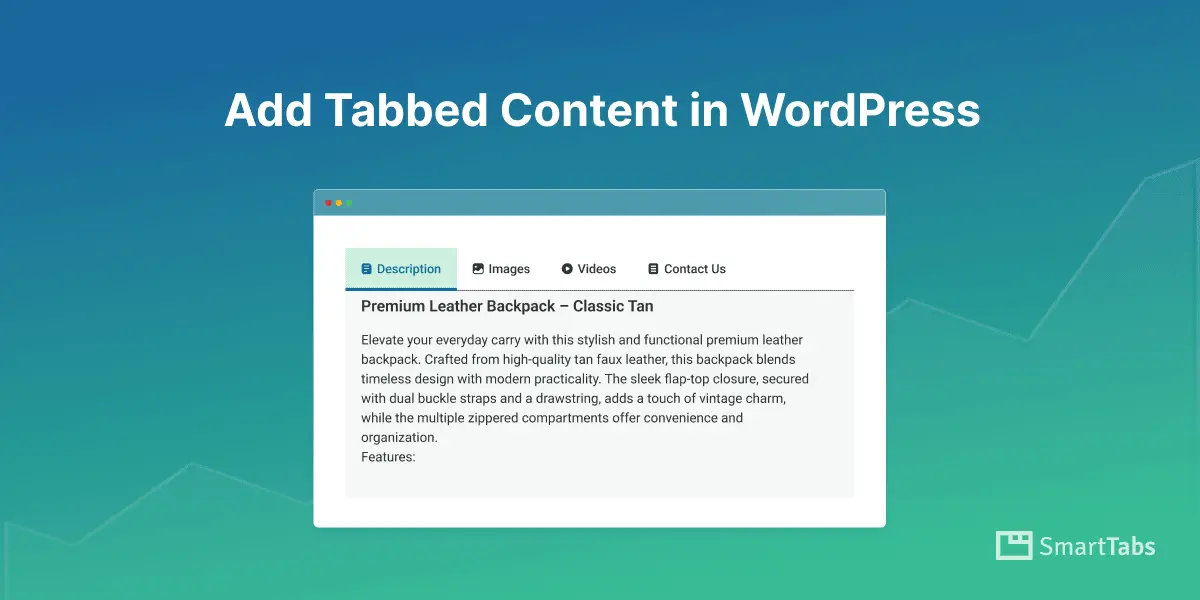
Tabbed content is a collapsible layout in which information is separated into sections, each connected to a clickable tab heading or icon. Users can click on the tabs to switch between sections without scrolling or leaving the page.
Tabbed content is commonly used on websites and apps to organize content simply and efficiently. And, it creates a seamless and interactive experience while keeping everything organized on a single page.
Why Add Tabbed Content Sections in WordPress?
Adding tabbed content sections in WordPress offers several advantages and flexibility. Tabs help organize large amounts of information in a structured way while saving valuable page space. Furthermore, they improve the overall user experience by allowing visitors to quickly switch between related sections without excessive scrolling or leaving the page.
Benefits of Using Tabs in Content Organization
Space-Saving: Tabs give flexibility to display a large amount of important information in a compact layout, keeping pages clean, organized, and less overwhelming.
Better Content Structure: Tabs help organize related website information in structured layouts. By using tabs, you can display related content — such as features, FAQs, or instructions—into logical, easy-to-scan sections.
Improved User Experience (UX): With clearly labeled tab headings, users can instantly find the exact information they’re looking for, increasing satisfaction and reducing bounce rates.
Higher Engagement: Tabs with stylish and structured layouts add an interactive vibe to your page. It lets users browse the content easily, increases engagement, and creates a more dynamic browsing experience.
Faster Navigation: Highlighting content with easy-to-navigate tabs allows users to switch between different sections of content within the same page without loading a new URL.
Cleaner and Modern Design: Tabbed content gives flexibility to professional content organization, allowing you to create a modern, organized layout that enhances your website’s visual appeal.
Optimized Performance: Adding content inside the tabs makes it easy to load content dynamically or defer inactive sections, improving page speed and overall performance.
Practical Uses of Tabs in WordPress Website:
Tabs make long contents such as text, posts, pages, images, videos, or products easier to read, better organized, and visually structured — all while keeping your page clean and user-friendly.
- Product details and specifications
- FAQs and documentation sections
- Tutorials and step-by-step guides
- Feature comparisons
- Service breakdowns
- Pricing tables and plan comparisons
- Portfolio categories or project highlights
- Displaying content within a single post or page without clutter and more.
4 Easy Steps to Add Tabbed Content in WordPress
Follow these simple steps to add Tabbed Content in WordPress in minutes — no coding required. WordPress does not include tabs by default, so you need a reliable tab plugin like Smart Tabs.
Step 1: Install and Activate Smart Tabs
Smart Tabs (formerly WP Tabs) is a lightweight and feature-rich WordPress plugin that lets you create fully responsive tabbed content quickly and easily. With Smart Tabs, you can organize content efficiently, improve user experience, and make pages visually appealing — all without coding. It’s a flexible and powerful solution to create tabbed content for any WordPress site. It’s one of the best tab builder plugins for WordPress, ideal for blogs, business sites, landing pages, or WooCommerce stores.
Key Features:
- Add text, images, videos, posts, products, shortcodes, and more inside tabs
- 10+ ready-made templates in Horizontal, Vertical, and Carousel layouts
- Automatic Tabs Convert in Accordion on mobile
- Supports Nested Tabs and Drag-and-Drop Ordering
- Tab Deep Linking for better navigation and SEO
- Advanced styling and customization options
- Fully responsive for mobile and desktop
If you’re new to this plugin, please check the documentation and install Smart Tabs in minutes.
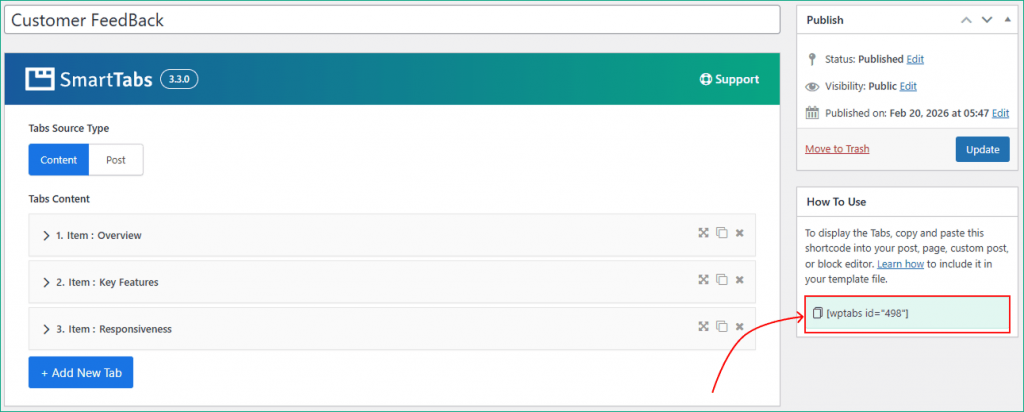
Step 2: Create Tab Group and Add Tab Content
After activating the Smart Tabs, it offers you to create unlimited custom tab text, images, videos, posts, products, or other supported content with the powerful WYSIWYG editor inside each tab.
- From your WordPress Dashboard, go to Smart Tabs.
- Click Add New Tab Group → Enter a Tab Group Title
- Select Tab Source Type as Content
- Click Add New Tab as you wish to add
- Add Tab Content: Tab Title & Tab Content
- Choose Tab Content Type from Text, Image, or Video
Repeat the process to create as many tabs as needed.
Note: You also allow tab deeplinking by selecting Make it Deep-Linking.
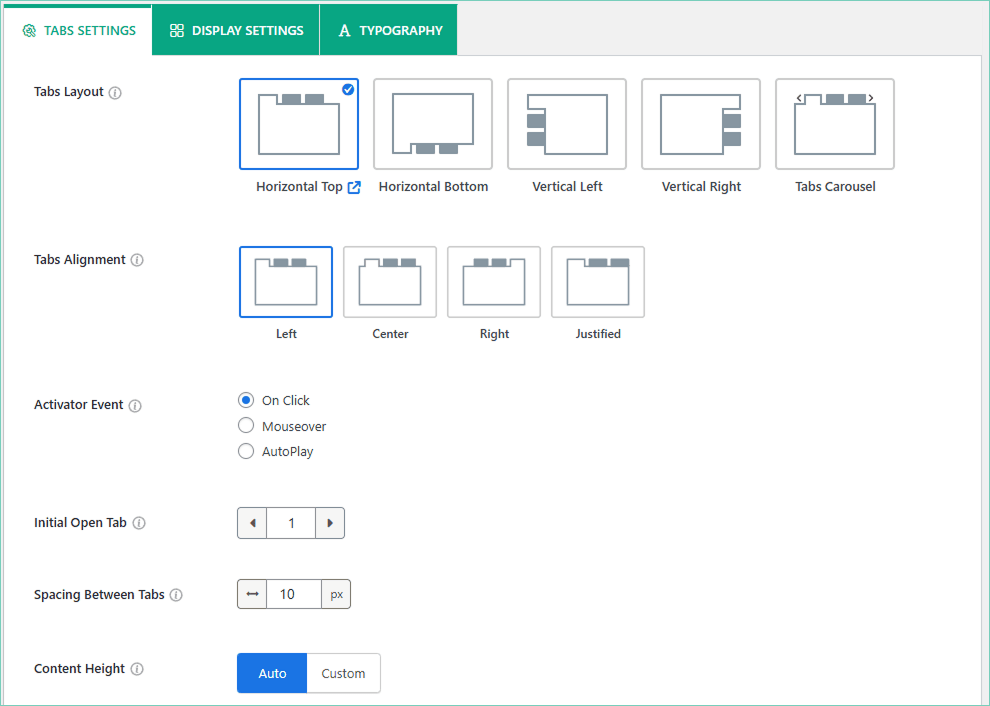
Step 3: Design & Customize Your Tabs
1. Once your tabbed content is ready, now time to style your tab. To customize the design, open the Tabs Settings panel.
- Choose your preferred layout (e.g., Horizontal, Vertical, or Tab Carousels)
- Set Tab Alignment & Opening Type as Click, Mouseover, or AutoPlay
- Set Spacing, Content Height, and Anchor Link Type as ID or Tab Title.
2. Navigate to the Display Settings panel, and choose how tabs will be displayed.
- Configure Tabs Icon, Name & Description, and Responsiveness as Screen.
- Set the Image & Video Gallery with Lightbox.

3. Move to the Typography panel and adjust the Colors, Global Typography, and Spacing as needed.
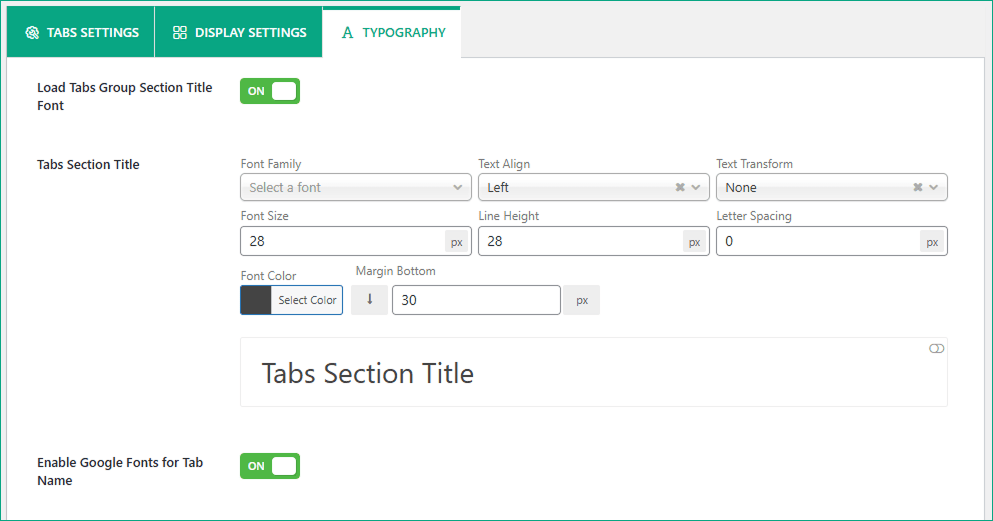
Use the Preview option to see changes in real time. When you’re satisfied, click Publish or Update.
Note: For a better tab design, you can read this article.
Step 4: Publish and Display Tabbed Content to a Page (Using ShortCode & Gutenberg)
Now it’s time to display the tabs in your WordPress site. After publishing your tab group, copy the Shortcode and paste it into Webpages, Widgets, or anywhere you want to display it.
You can insert the shortcode in a Smart Tabs Pro Gutenberg block. Also, you can use a shortcode, text, or code block to insert the shortcode.
To Display Tab Group using the Gutenberg block, follow the steps below.
- Open a post or page in Gutenberg
- Click the + (Add Block) icon
- Search for the Smart Tabs block
- Select your created tab group from the dropdown
- Click Publish or Update.
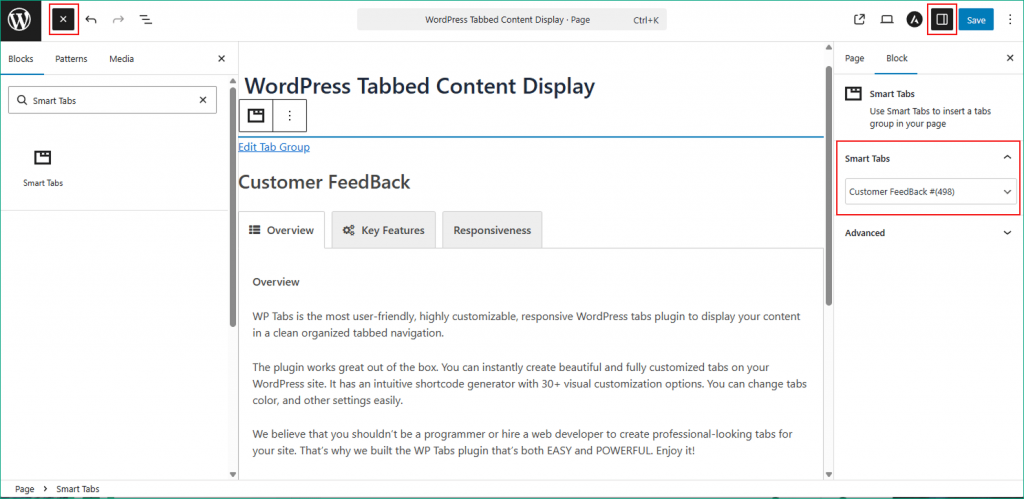
Congratulations! Your tabbed content is now live on the front end.
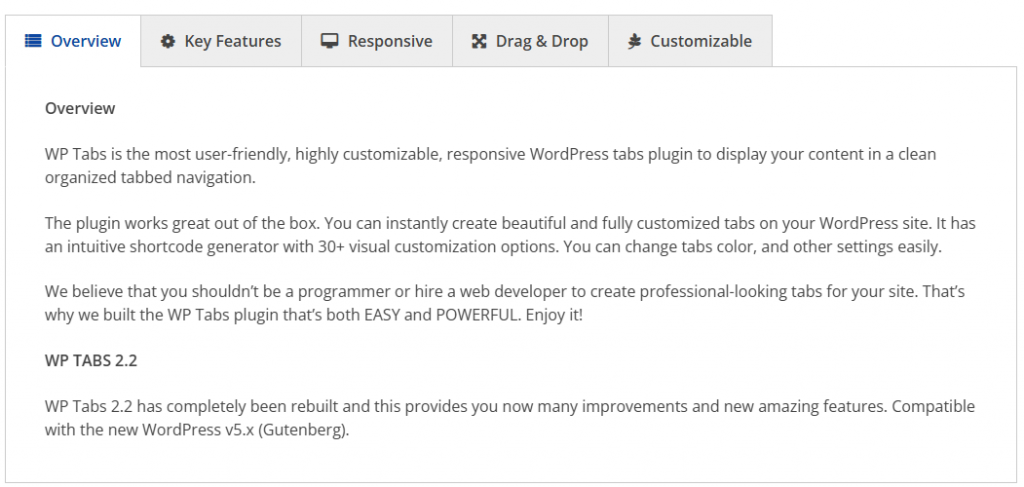
Here is a live demo of how your tabbed Content will be displayed on the website.
7 Tips to Create & Organize Tabbed Content in WordPress
To maximize the effectiveness of your tabbed content, follow these tips:
- Limit Tabs to 4–6 Sections to Avoid Clutter
- Use Clear, Action-oriented Tab Name, Titles & Descriptions
- Add Dynamic Icons or Upload Custom Images as Icons
- Organize Related Content Grouped Logically
- Ensure Readability with Proper Alignment & Spacing
- Enable Auto Converts in Accordion on Mobile
- Avoid Hiding Critical SEO content unnecessarily
Frequently Asked Questions
1. Can I Add Tabbed Content Without Knowing How To Code?
Yes. With plugins like Smart Tabs, you can create and customize tabbed content entirely through a visual interface without any coding.
2. Is Adding Too Many Tabs A Bad Idea?
Yes. Too many tabs can overwhelm users and reduce clarity. Ideally, keep between 4 and 6 tabs for optimal usability.
3. Will Tabbed Content Affect My Website’s SEO?
Tabbed content does not negatively impact SEO if implemented correctly. Search engines can crawl hidden tab content as long as it is present in the HTML. Avoid hiding critical keyword-heavy content unnecessarily.
4. How Can I Ensure That Tabbed Content Is Mobile-Friendly?
Use a responsive tabs plugin and test your layout on different screen sizes. Many plugins automatically convert tabs into accordions on mobile for better usability.
5. Can I Add Images and Videos Inside Tabs?
Yes. Smart Tabs allows you to add text, images, videos, and even shortcodes within each tab panel.
6. Should I Use Tabs for Long Articles?
Tabs are ideal for organizing long content into sections, but they should not replace important standalone pages. Use them when the content is related and does not need side-by-side comparison.
Final Words:
Adding tabbed content to your WordPress site improves organization, enhances user experience, and keeps visitors engaged.
By presenting information in a structured and easy-to-navigate format, tabs can reduce bounce rates, increase time on page, and support higher conversion rates. For businesses that want professional, responsive tab layouts in Gutenberg without writing code, Smart Tabs offers a powerful and reliable solution.
So why wait? Download Smart Tabs today and start delivering a cleaner, more engaging browsing experience for your visitors.
Leave a Reply